
A Guide To Painting The Indigo Flourish Sculpture
The two characters, Indi and Digo, can change their colors at will. Only these remain the same:

Eyes, nose, inner ears, tail wraps, and cloths.
Their hair and tail colors are one tone, while their body colors are reverse on the other character. Basically, if Indi has red and green, then Digo will be green and red. For this painting tutorial I chose the purples with red hair coloring like the modeling artist used, to show a fun but complex look.

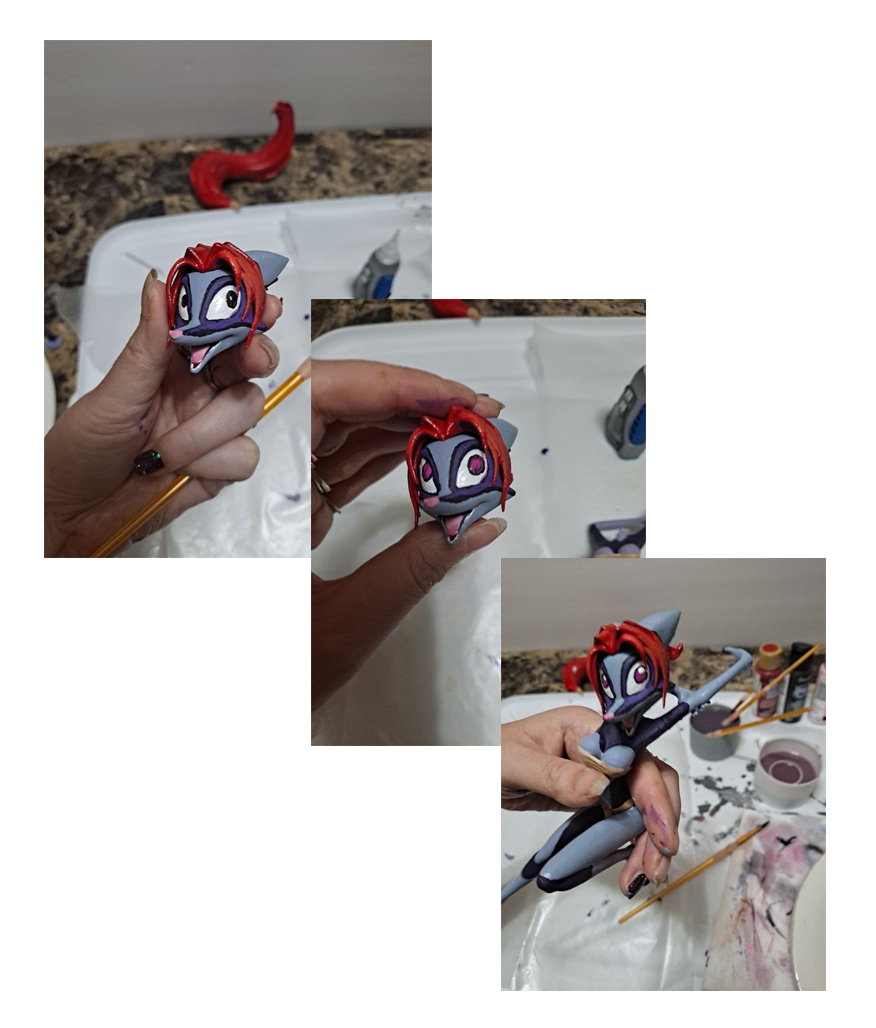
I began with a spray fixative and a primer in gray. (Allowing each layer to dry) and moved to the red for the tails, and the lavender for the bodies. Rust-oleum sprays stick to plastic decently, so I used that brand. If I had chosen to use a dark purple spray, it could be done, but it would be more difficult to layer the paints and get the look I wanted. My last two sprays, the red and purple are a satin finish, which gives a lovely plastic shine. The highlights I'm painting will remove that look from the bodies, but the gloss enamels for the eyes and teeth will keep the shine. I had to match the lavender spray to a nearly identical purple paint, since the ears and the hair are all one piece.
Generally, most people will prime their pieces before assembly, that way you catch all the nooks and areas for painting. To make sure the complicated color painting pattern worked, I decided to glue together a few parts ahead of time before spraying. Basically, it's discouraged to spray like this, but it can be done. Just be sure to test the spray paint on a flat piece of cardboard to keep all of the air bubbles out first.


One technique when painting 3d modelled figures is to paint a basic color layer and leave it like that. Personally, I like a layered blend of tones, so you'll see black patches become purples and highlights appear on the hair pieces, moving from dark to light. Since the ears and hair are the same piece, in this tutorial you'll need a paint tone that matches your base color, in my case, that lavender purple/blue. To get the same colors but lighter, mixing the paint tube colors with a little bit of white paint gives highlights.


These are the swatch images we use for the graphic novel.


So, Indi is looking to the side, Digo is looking up. Pieces are assembled, as you can see below, I'm using a glass and putting pressure on the foot to help the glue dry. The clear acrylic base provide works great, as long as Indi's foot can touch the ground.

Once the figurine is in place, it should stand on its own, on your acrylic base. Some little highlights are added on the tail and light purples once the entire sculpture is complete. "Dry brushing", the act of having a little paint on your brush, is used for the highlights. Rubbing a damp paper towel on these highlights will help to blend your colors. This alternate technique, which I didn't do, is "wash", which is watered-down paint being spread in the more detailed areas, bringing out the lines and nooks of the sculpture. The gray base in this photo was our temporary base until the clear acrylic ones arrived.

Usually a matte finish, satin finish, or glossy spray will be added to finished figurines.

If you need to support the weight of the sculpture but don't want paint or finish on the base, just put a piece of wax paper or tinfoil to protect the base during spraying, and you're good to paint freely.
Thank you for viewing my painting tutorial, we look forward to seeing alternate and stylistic ways to paint your figurines!
No comments:
Post a Comment